Tuesday, January 11, 2011

When crafting goes wrong.... Sigh.

I've mentioned before that one of the hurdles I got over that allowed me to enjoying crafting so much more... was realizing it doesn't have to be perfect.  Getting over that mental road block has allowed me to really get into crafting and have a lot of fun.  But sometimes, it's just a fail, and thats that!

I have been wanting to make a magnetic recipe board for a while.  I wanted to make it specifically as a gift to Pattie.  She's always talking about how she hates leaving a recipe on the counter because its never at the right angle to glance at easily.  (truth be told she's come up with a smart solution, resting the recipe card between two knobs on her upper kitchen cabinets, pretty smart!) Anyway, I started seeing lots of these popping up on blog world.. here's an example from From Glitter to GumDrops :


Cute, right?? I was kind of stumped on where to buy metal from. I mean, I know I'd go to Home Depot but I'd have to ask for help, which would mean actually finding an employee there... and thats where you loose me. 

So when I was at Michaels, with a gift card burning a hole in my pocket (Thanks Dad and Pattie!)  I stumbled on the cutest scrapbook paper. I should pause to say that with all my crafting, I've never really been inspired to make a full on scrapbook.  I dunno, just doesn't do anything for me.  There are so many options and so much potential, but all the power to you, it's not my thing.  But when I come across cute paper I have to grab it, knowing I will find a way to use it.  So as I was walking around Michaels, paper in hand, I decided to just wing it and make my own menu boards.  I quickly stumbled on a roll of magnet sheeting... magnet on one side, paintable white surface on the other. PERFECT! 

So I thought.

I started with painting my boards, and then cutting out the pieces of paper I wanted to use, and mod-poding them on. Easy enough, and it looks just like I thought it would.  But then when I open up the magnet roll, the white, paintable (a.k.a. prettier) side is not magnetic.  If I want to be able to slap a recipe card with a magnet on this I'm going to have to use the dark side.  Then I used hot glue to adhere the magnet sheet to the board, and you can see the outline of the glue thru the magnet. 


I made two, one intended to be my trial one I'd keep, and one that I planned to give to Pattie.  They now are sitting in my living room with no home, and no plans for me to use them.  I'm posting this not to show you my bad sides.. but just out of curiosity to hear what you would have tried to do differently?  Go to Home Depot and scrounge for an employee?  Do you have another idea for what might have been a better product to use?

Whatdya' think?

Friday, January 7, 2011

Jack was featured!!

My lil' man got his very own feature on my friend's blog!

I posted a picture of him on facebook this morning sporting his new superman outfit (that I LOVE!)

Not much later I was asked if it was ok if my friend stole the picture, and then I saw this!

http://www.zebraloudsounds.com/2011/01/jack-jack-is-superman.html

I just love him to pieces :)

Monday, January 3, 2011

Baby Olivia!

I have been wanting to post about this for-ev-er! But a horrible sequence of events prevented me from doing so.  I don’t think Josh’s sister, Jenny reads my blog, but… I didn’t want to take the chance.  She is due with a baby girl the end of this month.  Her baby shower was several weeks ago, but I woke up sicker than a dog the day of, and didn’t think it would be very responsible to go get a preggo lady sick!! 
So finally, I can reveal what I made.  So much of a cute gift is in the packaging. So I wanted to get a cute basket.  Her baby furniture is white, so it seemed pretty smart to spray paint the basket white.
Back Camera
I had originally wanted to get a small chalkboard plaque to write her name on, but it wasn’t happening.  So I went to Joanns and found this cute little plaque.  Some paint, distressing, and scrapbook paper… and I ended up with this! The letters didn't show up well in any of the pictures. It's light in person too, but not this light!
olivia sign
Now to fill it!  Pattie had just showed me her first rag quilt she finished and I was in love.  I was even more excited when she told me about a baby-blanket sized pattern that was in the book she used.  She gave me the instructions and off to Joanns I went.  It was actually really easy!! 
I started with 9 fabrics: 3 darks, mediums and lights.  Sticking with a baby theme, this proved to be harder than I thought! Jenny also isn’t a foo-foo super princess-y kinda mom so I was trying to stay away from tiaras and fairies for the most part.  Once I was home, I cut all the fabric into strips (there are a million different patterns out there, so I won’t get too into the specifics on measurements.  I can send you them if you are interested!) and then you sew strips of the same fabric together, so its double sided.  Then, cut those into blocks.
PB057773
Next you sew your blocks into rows, then sew the rows together.
PB057771
The trick is you leave a 1/2 inch seam on each block.  Then when you are done, you go back and cut about every 1/4 inch on each seam (highly recommend spring loaded scissors!) … and ya, it takes forever!  Put in a movie, stretch your arms and get to work!  Then when you are done, wash, dry, and bam! its all puffy and cute!! 
I was so in love with how this turned out! The best part is, all the ruffles and fluff hide your mistakes. Smile
PC238071PC238073PC238075
The one other thing Jenny mentioned that she needed was a new boppy cover.  She had almost all the baby essentials already from when her son was a baby… now she just needed it girly.  Just so happened I had just made a new cover for Jack’s boppy so I had the pattern ready to go.  I fell in l-o-v-e with this fabric:
PC238083
Isn’t it cute? And not princess-y at all!  This is only the 2nd time I’ve put a zipper on something (first one was Jack’s boppy!).  It’s easier than I had thought, for sure. 
PC238082
It’s definitely not perfect, but I got the fabric on sale for $2.50 a yard, you can’t beat that!
PC238084
So that’s what I made for Jenny.  I was so excited to give it to her! Here was the finished product:
PC238068
Sorry for the lame setting, I took these pictures in the hours before Christmas scramble when I knew I’d be giving her the basket and was running out of opportunities to take pictures! 
PC238070

Saturday, January 1, 2011

Christmas Gift Revealed - Monogrammed Wreath

The 3rd gift I made was for my sister, Lizzie.  I guess I lied earlier, because I was nervous to give her this, too!  But while I was disappointed in the one I gave Katie, I was super excited with out this one turned out.  I have actually wanted to do one of these for us ever since I saw it on The Bird's Papaya.  However, we don't all have the same last name yet (nudge nudge, Josh!) so alas I will have to wait. 

I knew I wanted to make something for Lizzie, but I didn't know what.  She moved into her now, husband's home, so it still is very bachelor pad-y.  She is definitely itching to add her flare.  So she told me the direction she wanted to go in was dark blues, purples and blacks, but still with a beachy feel.  For some reason, this wreath popped into my head! So I got started. 

First I got a wreath at Michaels, and spray painted it black.  I did a few coats, but didn't go nuts, I didn't mind some of the brown sneaking thru.
Next, I took a stab at making fabric flowers.  I have seen these tutorials popping up everywhere.  The basic principle can be applied.  Take a strip of fabric, tie a knot at one end, hot glue it to a piece of felt, and then twist and glue your way into a flower.  For some reason, when I was walking around Joanns, burlap kept popping into my head, so I went with it.  They are super easy to make, just be careful pushing the fabric into glue.  Hot glue gun=hot!  (DUH!)

I also made some in plain white fabric I had on hand.  To add a more beachy feel I added a shells.  The neat story behind these, is that they are actually decorations we used for Lizzie's bridal shower 2 years ago.  I had held on to them knowing I'd find a use, and well, here you go! 


Lastly, I added some ribbon to hold the C in place, and it was good to go!!  This is the picture Lizzie sent me, of the wreath hanging on her front door. I'm so thrilled she likes it!!


Another Christmas Gift - Superhero Cape!

Ok, I'm just gonna put this out there now to please excuse a)all my iphone pics, I was so lazy about getting out my camera, the only time I did was when I lost my phone for an entire day 2 days before Christmas. (I have never lost my phone before!) b) the mess in the background of all the pictures! Just keepin' it real people.

Anyway, Josh's sister, Jenny, told me that her son Kai LOVES wearing the capes they have at his school, and could I make him one?  How cute is this:  I asked Jenny what is favorite color was, and she laughed and said pink.. soooo why don't we go with red.  ha!  Now thats a cool kid.  If you know Kai, you know he's obsessed with the Disney movie, Cars.  So when I was getting the red fabric I couldn't resist sneaking in some Cars fabric for the inner lining.  I added a super hero "K" on the back for good measure. 

There are a million guides and templates online for how to make the perfect cape.  Jenny told me he's just about 3 feet tall, so I ended sizing down 1 yard of fabric to about 26 inches when it was all said and done.  Then I cut it at an angle so the top was narrowed in from the bottom.  I added a seam for a drawstring, and that was that! 


(it was laundry day, my sheets were in the wash, ha!)


I am hoping Jenny will send me a picture of him in it, if he ends up wearing it.  Kai is shy (also terrified of Josh, haha!) so he wasn't into trying it on Christmas day!

The thing I love about this too, is that I think like many people, we were on a tight Christmas budget.  For the money I spent, this means a lot more than what I could have gotten as an equivelent toy for the cost.   Here is the break down:

Cars Fabric:  $8.99 - had a 40% off coupon so the cost was $5.39
Red Fabric:  $3.99
Felt for the K $.59 (I think!)
Black Shoelaces:  $2.99
Thread - already had
Total Cost:  $12.96 (plus some tax!)

First Christmas gift, revealed! { finally! }

Wow... Dec 10th was my last post.. whoops!  I learned a valuable lesson these last few weeks.  It was Jack's first Christmas, and things were chaotic.  I had this great idea of making a handful of my gifts this year, which I am so glad that I did, I just wish I was a little more proactive about it.  We ended up having to jam pack so much in (also in prep for getting the girls xmas morning) that I didn't take a minute to just breathe.  The day after Christmas I was so disappointed in myself for missing moments I could have had with Jack, making his first Christmas special.  Josh rationalized that he's 5 months old, he doesn't know any different.. but we never even got a picture of the kids in front of the tree.  It was a valuable lesson for me to keep in mind going forward to stay true to what is important to us, and realize the rest will find its way to work itself out. 

Now that I got that off my chest, I can finally reveal a bunch of things I was working on!  I don't think anyone that I made gifts for read my blog (I only have 6 followers, lets be honest!) but I didn't want to risk it. 

I was most nervous about my gift to my oldest sister, Katie.  She moved up to Northern CA a few years ago, and I'll admit the distance makes it harder to know what to get her for a gift.  We don't have those day to day interactions where you catch her eyeing a cute top at at store, or saying she needs something for the house.   One thing I know about Katie, and her husband, Devin, is that they LOVE The Beatles.  A few months ago I stumbled on a ton of subway art ideas.  I really love the look.  One day the idea came to me to make a subway art, Beatle themed.  Then I took it one step further that I wanted the background to be a faded black and white version of the famous "Abbey Road" picture. 

Sigh, if only it was all that easy. I could give you a long winded excuse for why it went from this grand idea in my head to something of a much smaller scale... but I'll save you the details.  The bottom line is, Katie swears she loves it... I hope so!!  In our mad dash frenzy to get everything done in time, I completely forgot to take a picture! So Katie was kind enough to snap one and send it over.  Here it is:


It's mounted on a piece of MDF board, painted black.  My days with subway art definitely aren't over.  I'm on a mission now! 

Friday, December 10, 2010

Babies!

I think I've made it pretty clear how head over heels in love I am with Jack, and being a mom.  It is seriously the best thing that ever happened to me, and I LOVE talking about it!  So when my friend Michelle told me she was pregnant (while I was still prego, too) I was so excited for her.  After having Jack, I was even more excited for her.  I think she was honestly sick of me towards the end there of jumping around with excitement everytime I saw her, exclaiming "I AM SO EXCITED FOR YOU! IT'S GONNA BE SO GREAT!"... she's a good sport.

So I've been trying my best to not be a pest (haha that rhymed) and not asking her every day if shes having contractions.  So I stalked her Facebook page instead.  Ok now I just sound creepy, I wasn't sitting there hitting the refresh button all day, but I did check a few times, once I knew she was at the hospital!  Then once I knew little Emerson Rose had entered the world I literally had to sit on my hands and wait patiently before writing to her to ask when I could come visit.   2 days after she was born I couldn't resist and my fingers feverishly sent her a text, and we set up a time that was good for her. 

Of course I couldn't go empty handed, so I made a little something.  I started with a mish mash of goodies from my craft supply:

 And added some decals from this project... and made this!

I left the hair and eye color blank because I wanted to wait until I saw her and could be sure!

She is just precious and I am so thrilled to see my friend have that mom-glow that I promised her was on it's way and made all that end-of-pregnancy-awfullness worth it! Welcome to the world, little Emerson Rose!

Tuesday, December 7, 2010

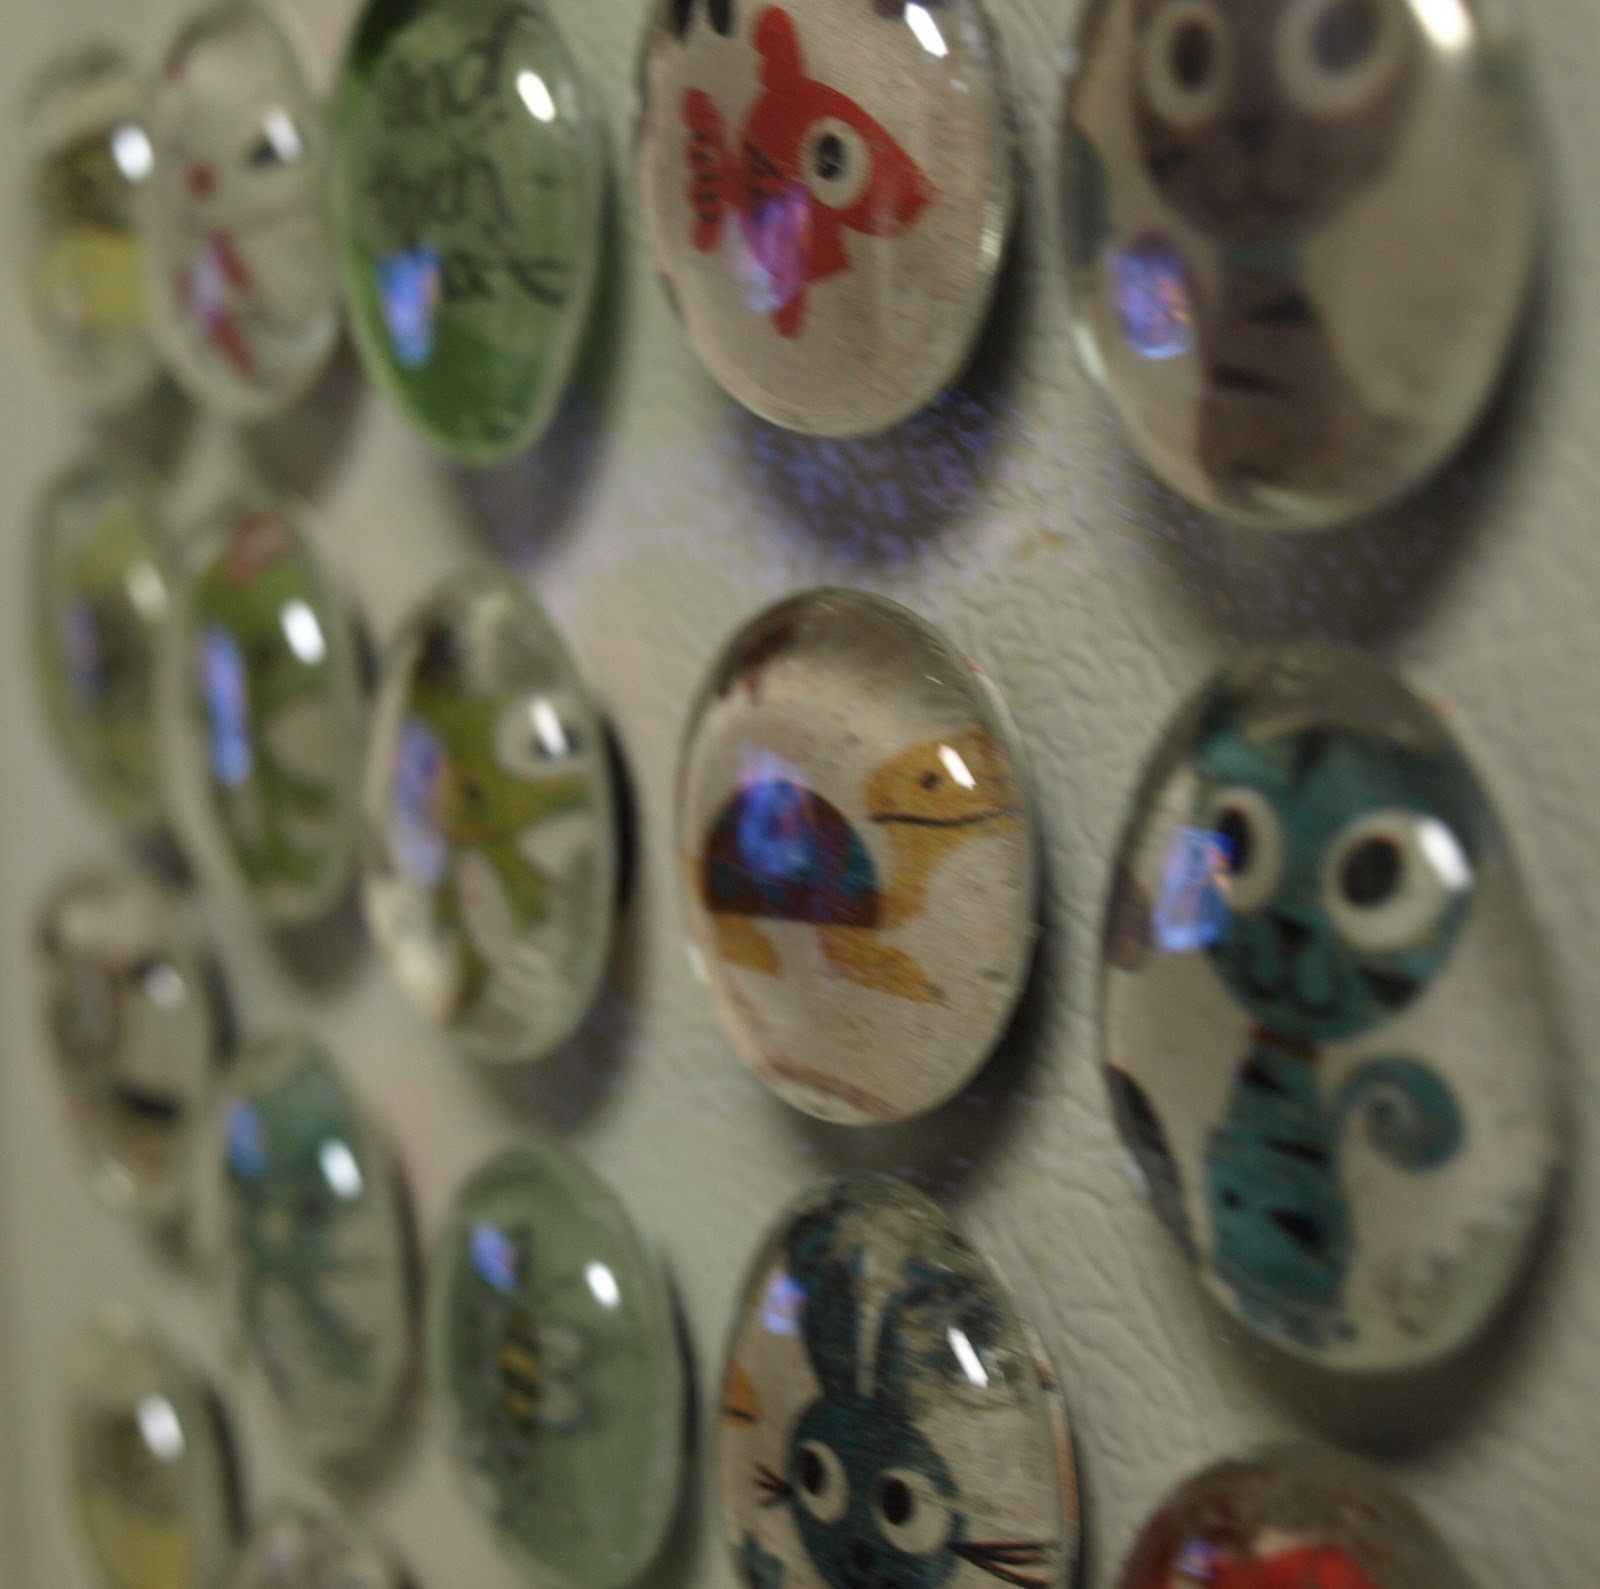
Glass Magnets


As soon as I saw this idea on Christina's Adventures I couldn't wait to go get the supplies and try it out.   I was telling my sister, Amy, about it and she wanted to give it a shot, too.  So Sunday afternoon we set off for supplies and got to work.  As usual I forgot to take pictures as we went... and I feel even more silly because I had an extra set of hands, so taking pictures would have been a sinch!  Oh well! We varied from Christina's suggestions a little here and there.

Here is what we did:

We decided on a portion of the scrap book paper we wanted to use and cut out a piece a little bigger than the stones.  Then we mod podged the stone, slid the paper on to where we wanted it to show thru and let them dry.  Once they were dry we carefully cut the excess paper off (easier than you think) and hot glued a magnet to the back.  We saved that part for the end and did all the magnets at once, placing a heavy book on top while they set.  Christina used gorilla glue.. which I've never used before.  I'm guessing it's more heavy duty, so if you are worried about them separating, you may want to use that instead.  We decided to take a walk on the wild side and risk it. 

Aren't they cute?  Like typical girls, I was jealous of the cute cartoon character ones Amy did, and she liked the way mine looked. 


Brittany, I put this picture in just for you, see the owls????

This was way fun, and way easy!  I think these will be great office xmas presents considering I just joined a new group and don't know anyone.  Who doesn't use magnets?   Plus it was so fun to have someone to craft with.  Not that I don't appreciate Josh pretending like he is as excited about something as I am when it comes to crafts... but having someone to chat with and get new ideas from was nice!

Tuesday, November 30, 2010

My first furniture redo!!

Ok, so it's not monumental... I didn't find this beat up gem of a way super cool dresser for $5 in the back of some store and make it into the most beautiful thing ever... but it's a start!

There is a thrift store a few blocks from work so I've stopped in a few times just to see what they had. It's not the best thrift store, in my opinion it tends to be a little over priced but I still go in, hopefully every time anyway. Well finally it paid off. I was scanning the shelves over the typical things and I spotted this little guy:


(Yay for being lazy and using my phone to take pictures.... Hi Gismo!)

Admittedly, I think it's cute as is. But alas, I don't live in a cabin in the woods, so it really doesn't match our decor. The best part: sticker price $5.99 WOOHOO! I was so excited I could have skipped to my car - even I saw my inner nerd shining thru.

I decided this piece was going to go into our room. Let me just take a minute to say, our bedroom is the most neglected room in the house. There is no design, no anything. It's a functional room with a bed, dresser and nightstand. But it becomes the dumping storing grounds for all the things in our house that don't have a home. There are piles in every corner. I've managed to keep them somewhat neat at least, but I walk in the room and just sigh. I actually have an official plan of what I want to do (an inspiration post is in my near future) I just need the money fairy to come visit our house first. So I'm hoping if I start on the smaller, less expensive things and make them into the future color scheme it will annoy me enough to just suck it up and do it all!!


Back to my project. Once the kiddos were asleep I got to work. I gave it a light sanding and wiped it down, and then taped in the inside because I definitely don't have a steady hand when it comes to edges! First I did a few coats of black, then painted the back panel white. Pretty simple!!


I was impatient and wanted to take a picture so a few more touch ups have happened since. I'd love to have it all on the wall with cute things on it but I'll just have to save that picture for when the whole room is done.


Monday, November 22, 2010

Stockings & Quilts

This weekend, the Joanns flyer came in the mail (swoon!).... with allll of their black Friday sales and coupons to boot. By the third "look at this!" to Josh I had received enough eye rolls to know the excitement was limited to my side of the room. Besides a personal Cricut getting marked down to $69.95 (seriously?!) and all their holiday items 50% off (woohoo!) the biggest sale for what I already need is on fabric. Kali really wants to make a rag quilt which uses flannels. To give you an idea of the deep sale... regular price on all flannels is $5.99 and up. This weekend all flannels are $1.29 a yard! Are you for real? So I think I'm going to put a "kit" together for her so she can make one. I am so excited!

I'll also need to pick out some super cute Christmas fabric to make these babies:

I was so excited when I just "ran" into Joanns for a "minute" last night and all the McCalls patterns were on sale for $1.99 (regular price $15.95... I LOVE a good sale!) and they still had the Christmas one I wanted with the super cute stockings. Now, patterns scare me. I am still such a beginner that I get confused. Just ask me about the curtains I am making for Jack. My biggest downfall is cutting. The whole measure twice cut once thing, should be measure about 50 times, have someone else check it... ask if they are sure.. again.. and then make them be the ones to cut, for me. So hopefully these are a success! The nerd in me is SO excited for our family to have matching stockings! Is it weird to buy enough fabric for another one in case Jack ever gets another sibling? (Josh turned white when I asked this, hahahahaha!)

So I think Joanns is just about the only place I am going to brave Friday morning.. I just can't pass up those fabric sales!!


I'll keep you posted.

Sunday, November 21, 2010

Menu Board!

I've seen a bunch of variations of these popping up in blog world, so I just had to give it a try. Every Sunday after the girls leave for their mom's, Josh and I sit here staring at each other hoping the other will decide on dinners for the week so we can hurry up and get the grocery shopping over with. I end up scribbling meals on a paper and throwing it on the fridge. However, my OCD h-a-t-e-s lots of clutter on the fridge. Perfect excuse to craft!

This came together easy peasy quick. I got the frame at the Dollar Tree for yep, you guessed it, a dollar. Scrap book paper and cardboard letters were a fun find at Joanns. 10 minutes later, viola! Our menu board.

Like my artistic "ooo I'll take pictures by the fire" shots?

Sunday, November 14, 2010

Baby Shower Fun

This weekend did not go as planned. I had to go and get sick. I've actually been fighting a cold and it came to a head this weekend, totally knocking me off my feet. So I am totally disappointed to report I did not make it to Jenny's (Josh's sister) baby shower. However, I do some things I can share.

Josh's Aunt Harriet enlisted me for help on a project. Jenny requested a candy table and Harriet wanted something cute for guests to be able to use to put candy in. I googled and found these adorable pail kits at Michael's... even came with labels to print out "it's a girl!" Puuurfect. Well silly me waited until Friday night to go get them. Josh, Jack and I trekked into Michael's only to realize the pails were TINY. Like.. how about a gumball or two and that's it, tiny. Silly me should have paid more attention to the size ratio printed on the box! duh.
Hmmm.... enter panic mode! I did remember walking by mini Chinese food take out boxes... so I showed them to Josh and asked how we could make this work. Twenty minutes later we had a plan. What would I do without him?


These cuties only took about an hour to assemble all together. I haven't heard how the shower went yet, but I hope they were a hit!


More on what we made for Jenny, to come.

Monday, November 8, 2010

Shelving fun!

So within a few weeks of Jack being born we officially out grew our home. However, we have it in with the landlord (love you Dad!) so we are going to stay here as long as possible while saving up to buy our (hopefully) "forever" home. So what do you do when you run out of room? Go up! No, we aren't adding a second story... but we have vaulted ceilings with tons of wall space just begging for something... shelves!

Our living room serves as our central command station... tv, computer desk, sewing desk, and the most perfect huge fireplace that happens to sit smack dab in the center of the only solid wall in the room. It's long and narrow and totally awkward but it's our livingroom! Josh's biggest pet peeve is his small computer desk becomes dumping grounds for all odds and ends (thanks, girls!) and he can't get to the basics - his pens, notepads, etc.

Light bulb! I can work in an excuse to go to Joanns AND solve the problem! I found this cute shelf and thanks to a coupon got it for $10. Some black paint helped it match our decor and in a few hours Josh was a happy camper!


I'm itching to think of something cute he can hang from the hooks... or I guess we could be practical and hang headphones and other computer cords up there.. but that wouldn't be cute. :)

Update (excuses for no pictures)

So... I half wrote a blog entry last Friday with the intention of plopping in some pictures - once I took them. Now it's Monday, I took the pictures but they haven't made it to the computer yet... and everything I wrote about on Friday is now in the past tense.

I NEED MORE TIME!!!!

I was a busy bee crafting big time this weekend and it kills me to not be able to share. But, they are a gift for a shower coming up so I can't spoil any surprises. So next Sunday I can show you!!

So this last weekend:

Was Josh's 30th birthday! We are bit low key so Josh didn't want a big party. The girls wrapped gifts for him, we had his favorite breakfast, and his parents took us all out to Bucca di Beppos for dinner. I think he felt kinda loved by the end of the day. :) I also made my self-proclaimed famous cheesecake. Naturally I forgot to take a picture, but there might be one slice left in the fridge I'll snap a picture of!

Next weekend:

My oldest sister, Katie is coming into town! She lives up in San Jose and hasn't met Jack yet! We are all very excited for this to happen. Since we all have separate plans for Thanksgiving... this will be a rare time that we are all in town and free, Pattie jumped on the chance to do a "mock Thanksgiving" a week early. So we'll all head over to my parent's house Saturday and hang out. I've informed the ladies of the house that we will be doing a fun fall craft. Selfishly - this is one I have wanted to do since I saw it weeks ago but have had no time. So I decided to squeeze it into our visit!

Sunday is Josh's sister's baby shower. I am just so excited for her. She has an adorable son who is 5, and such a boys boy. So, naturally, I am thrilled she is having a girl. She needs to balance out their house a little with some princess skirts and tea parties. :) So as I said before I"ll show you our gift to her after she sees it next week! However, I also offered to help Josh's Aunt Harriet with something for the party. Jenny (Josh's sis) requested a candy table at the shower. So we needed to come up with something cute for the ladies to put their candy into. We decided on getting little white pails and decorating them. I love the idea - now I just need to hurry up and do it!!! Luckily Joanns sells a kit to make just such things... shh don't tell! Shortcut!!

On top of that there is work, Jack, dogs, laundry, chores, dinners and much much more to take up my time!! I promise to get those pictures uploaded and show you a few things going on in our world!


TTFN!

Monday, November 1, 2010

Our Halloween!

Happy Halloween! Here is our little guy in his first costume... he was such a trooper! It was a REALLY warm costume, and he runs hot like his daddy as it is... he put up with pictures and visits with grandmas and grandpas!
What a weekend! I am pooped! Right now, we only see Josh's girls on the weekends. So when they are here, we jam pack a lot into our days sometimes. This weekend was no exception. Saturday we picked out our pumpkins, made cookies to decorate and of course carved our pumpkins. We also had to watch the Shrek Halloween special and the Charlie Brown Pumpkin Patch Classic. Here are some highlights:

I have never made cookie dough for cookie cutters... so I went onto the trusty allrecipes.com website and found this recipe. I made it in the morning before we headed out to run errands and by the time we were ready to make cookies about 3 hrs later, it was good to go. They were super yummy too, so I'd highly recommend the recipe!

Once they cooled, we were good to go with decorating.. the best part. These cookies ended up NOT being passed around to family after Kali and Mackenzie had such a good time licking their fingers after every single cookie. LOL we'll keep our germs in the house thanks!


As a side note I had a moment of brilliance after we put the last batch of cookies in the oven. Mackenzie is a difficult, picky eater. It's a daily battle. Well since we already had the table covered in flour, we decided it would be a great night to make pizzas. I was rolling out the dough for the girl's pizza and thought hmmm.. yep! You can use cookie cutters on pizza dough! The girls loved it! I was so tickled at the idea, the next morning we had Halloween shaped pancakes too.... (enter Josh's eye roll here). Hey at least we got our money's worth out of the Halloween cookie cutters!


Anyway, onto the pumpkins. Every year I egg the girls on, to get the biggest pumpkins they can find. I always do this in a moment of stupidity, forgetting that I live in a house full of sissies who refuse to touch 'icky pumpkin guts'... so after I gutted 5 (ugh!) pumpkins, they were ready to carve!
Jack helped!